Tresspasser – Version 1.0 – 11/12/98
Sinjin’s Survival Guide to Site B (c) 1998 by Mark Smith
Introduction – Welcome to Jurassic Park Site B
Trespasser is a game like no other. It features incredible real-life physics
and some of the most advanced artificial intelligence (AI) ever seen in a
computer game. In fact, everything is so life-like that you will find real-life
solutions to real-life problems. This means that there are virtually endless
solutions and possibilities for any of the puzzles you will encounter on your
adventure.
To that end, this walkthrough will not furnish you with a linear progression
through the island. That would spoil the entire game since you have virtually
unlimited freedom of movement within each of the game’s levels. What this
walkthrough will do is outline each of the levels, the dinosaurs you may
encounter, and the various objectives/checkpoints you need to visit to
complete each level. You can visit these checkpoints in any order you choose
or even choose to ignore a certain path if you wish.
I have included small maps for each section of the island. These maps
include critical waypoints and other interesting places to visit. Their layout
is generally correct with regards to direction although there is no scale or
relationship to actual distance from one waypoint to the next. Remember,
you can explore each section of this game in total freedom. Aside from a
few critical items you must find to complete the various puzzles, you could
conceivably ignore my maps and text and figure out most of this game on
your own.
So when you are ready, prepare to enter Jurassic Park Site B. You are not
welcome….you were not invited… you are the TRESPASSER!
The Beach – The Training Area
Objectives:
– Leave beach and climb hill
– Learn how to manipulate objects
– Practice climbing and jumping
– Learn how to aim and fire weapons
– Uses boxes to get over wall
– Cross first gap in path
– Meet Brachiosaurus
– Cross second gap in path
– Kill the Raptor
– Climb the teetering ramp
– Find the Monorail Station and Exit
This first level is basically a training area for you to get the feel for the
interface, moving, jumping, and manipulating various objects. You begin
your adventure on the beach at the site of your plane crash. Explore the
area, play in the water, then head inland toward the big white rock to the
left when you are ready.
Jump up the rock then walk up the narrow sloped ledge of the hill to make
your way to the top. You will find the ruins of some sort of foundation for
a structure that was never completed. Here you will see several barrels,
boards and crates. Play around with these and practice picking them up,
twisting them and throwing them around. When you are comfortable with
how your arm works, head inland to the concrete structure.
Practice your climbing and jumping to get to the top of the wall. Toss some
barrels off the side and enjoy the view when you reach the top. Head back
down and make your way to the first wall and the gate. Walk into the gate
to knock it over.
This next area has the first of a huge variety of firearms you will find and
use in this game. You can carry two items at a time so grab a couple
weapons and start shooting things. Boxes and cans are stacked around this
area for your shooting pleasure. You will even find some rocks you can
throw when you finally run out of ammo. You may want to hang onto at least
one gun before leaving this area.
The next gate isn’t as easy as the first. You will need to jump onto the
various boxes and crates to get over the wall. Move them around to make
steps if you need to. Leap over the wall from the top of the box and
continue along the road. Checkout the billboard as you continue further
inland. Soon you will arrive at a deep ditch in the road with 3 crates. An old
truck off to the right hides a Hunting Rifle which you can get before
solving the first of many crate-puzzles. Knock the crates over and use one
or more of them as a step to get out of the depression on the other side.
Once you have made it across some music will accompany the arrival of a
pair of Brachiosaurs in the valley below. They won’t bother with you so
watch as long as you want before moving down the road to the next ditch
and more boxes. This puzzle is a bit more challenging. Pick up one of the
conveniently placed rocks and toss it at the stack of crates. You should aim
for the top so you knock one of the smaller boxes into the ditch. Use the
box to jump out of the depression and continue around the bend.
As you enter the next valley you should spot an abandoned truck down to
the left. Approach the truck and find the Desert Eagle .44 and Baseball Bat.
Arm yourself as you see fit then continue along the path towards the small
cliff and wooden structure.
About this time your first hostile dinosaur is probably charging at you from
behind. Turn and kill the Raptor then solve the ramp puzzle. There are
multiple ways to solve this puzzle. You can climb the beam and jump to the
platform then run up it and jump to the top of the cliff, or you can toss a
rock on the non-cliff side of the plank to make it lower down so you can
run and jump, or you can go under the platform and jump up to lower the
other side down to where you can run up and jump over. This is typical of
most of the puzzles in Trespasser, and in the future I will only be telling
you the way “I solved each particular puzzle”. Feel free to find alternate
and possibly better ways to do things.
Follow the road until you come to a weapons locker (white box) with a
Desert Eagle inside. A Raptor is attacking from the right just about now, so
you’d better kill it. Continue following the road until you finally arrive at
the Monorail Station. Climb the stairs and listen to the broken recorded
greeting. Then jump out onto the tracks and head toward the wood fence.
Jump the gap in the track using the narrow beam to gain extra jumping
distance. Finally jump off the end of the track, over the wall, and into the
next area.
Jungle Road – The Monorail Trail
Objectives:
– Follow Monorail supports
– Search shed at recreation area
– Watch the Triceratops vs. the Raptors
– Search the Plantation house
– Use the Call Box
– Use crane to get on Monorail
– Walk/jump along broken Monorail to Exit
As you explore this next section of the island, always try to keep the
monorail supports in view. These are your guide to the end of this part of
the island. If you haven’t noticed, you have NO WEAPONS. This will be the
case when you start each of the following sections. Fortunately there are
always weapons nearby at the beginning of each level so grab the Desert
Eagle out of the box and follow the trail of monorail supports.
To the left you should see barrels and pieces of monorail parts. Buried in
all of this is a T-Rex Tooth; certainly not the best weapon you could want,
but it will kill at close range. As you follow the monorail you should soon
come across a Smith & Wesson 686 (that’s a gun – not a computer). You will
also spot a Jawbone which also makes a good weapon, but remember, you
can only carry 2 items and range weapons like guns are ALWAYS better
than slashing weapons.
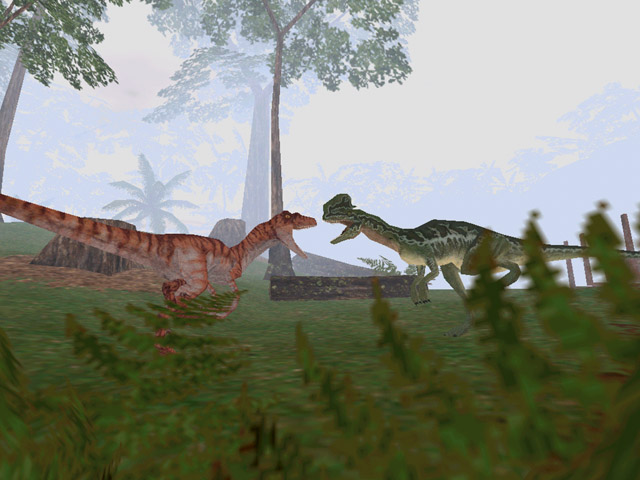
Soon you will arrive at a small clearing where a Stegosaurus is wandering
around eating some plants. Further down the road are a pair or Raptors who
are stalking this big fella. You can either kill the Raptor (and save the
Steg), or try to sneak past them all and hope the Raptors are more
concerned with their hunt than with you.
At the end of the road is a small cliff with the large box you can use the
Helmet or fire one of your weapons to knock a box down from the concrete
rails. Move the box over and use it as a step to get onto the bigger box and
finally up to the top of the cliff. You can avoid this puzzle entirely by just
walking around to the left but you really should get some practice – later
you will have to do things like this.
You will soon arrive at a small recreation area which consists of a shack,
some horseshoes, and a basketball. A Raptor is hiding behind the shed and
he isn’t here to “shoot hoops”. After you give him a permanent “timeout” you
can get the Desert Eagle from under the trashcan and knock away the
boards to get the Bennelli Shotgun from inside the shack.
A crashed jeep down in the valley has a Ruger Redhawk but you should be
fully armed at this point so why bother. Follow the trail that continues on to
the right of the shack. It will wind around to the left and eventually
overlook a valley where a Triceratops is squaring off against a hungry pair
of Raptors.
You can watch the fight and see who wins (the outcome is not scripted), or
you can sneak around to the right or left while they battle. Heading left
leads to the old Plantation House which contains nothing of value and is
guarded by at least a single Raptor. If you want to sightsee and kill another
dino then go check it out. You can continue past the house and past the lone
Parasaurolophus to bypass many of the obstacle you would encounter if you
went right back at the battle. You would eventually wind around and end up
at the Crane.
If you do go right then continue to the waterfall and turn left and head up
the hill. Further up an even higher hill to the left (back by the battle) is a
pretty cool stone ceremonial circle that overlooks the valley. There is
nothing of interest there but you may want to enjoy the view. Continue along
the designated trail to reach a call box.
No matter what you dial you will get an annoying recorded message saying
the phone is out of order. You really didn’t think it was going to be that
easy? Climb up the boxes and jump to the lower part of the sloped monorail
track. Head up the track until you reach the stacked crates. A pair of
hungry Raptors should be circling below. You can try hitting them with the
crates but you will probably need to kill them with more conventional
weapons before it’s all over.
Drop down to the stack of boxes to avoid taking serious injury then to the
ground where you will find a Bennelli Shotgun on the ground and a
Redhawk in the white weapons locker. Continue along the valley until you
reach a tower of large crates with a few lone boxes on the top. One of
these boxes has an Calico SB5 on it which you can possess if you can shoot
the box off the stack of crates. You will also find a Redhawk lying on the
ground in this area. Once you have these new weapons, drag the box over to
the larger box against the short cliff and climb up to continue.
Continue along until you reach a deep valley. A Stegosaurus wanders around
this area and he is being stalked by a pack of Raptors. They are hiding in
the woods to the right so head down the left side of the valley to put some
distance between you and the fight. If they attack you will have plenty of
time to line up some headshots. Continue on until you reach the Crane.
To the right of the crane is a Barrett .50 Caliber Mounted Sniper Rifle. You
can’t take this baby with you, but you can sure have some fun. Kill any of
the Raptors hanging around this area, or any that followed you from the
hunt. If you have any ammo left over you can shoot the crates off the
monorail track just for practice.
When you are ready to continue, climb the arm of the crane and get into the
basket. Then jump over to the tracks and start to follow them. Knock off
any crates that get in your way and jump over any gaps. If you fall, you can
always go back and start over or you can just continue along the ground.
While you are safer in the air, the falls may do more damage than the
Raptors ahead of you.
Eventually you will come to a big gap in the track that will force you to the
ground. A sloped piece of track puts you back on the next piece of rail and
you must stay on this track to finish. Falling at this point is almost certainly
fatal and there are many Raptors which are waiting below to feast on fresh
meat. Halfway along this track you will see a shack to the left with a
Hunting Rifle on the roof. If you are hard-up for weapons you can jump
over and get it, but this is a one-way trip and you will have to run along the
ground, either back to the beginning of this section of track or to the next
crane that leads to the third monorail section.
When you reach the crane you will want to get on the ground and explore to
find the Desert Eagle by the crane and the Bennelli Shotgun in the weapons
locker. Climb up to the final section of the track and climb the boxes. Look
straight down and then drop right onto the narrow beam that leads to the
next rail.
Continue along and climb over more boxes. You will eventually reach the
end of the track and exit this area of the island. If you fall, you can
always fight the raptors and exit up the small hill. Either way leads to the
end.
Industrial Jungle – Jungle of Death
Objectives:
– Follow the dry riverbed
– Avoid the T-Rex
– Follow rocky gorge
– Cross the fallen tree
– Climb the black stone steps
– Avoid the Albertosaurus
– Climb the crane to enter the town
This level get pretty difficult at the beginning with lots of predators and
not very many weapons. If you fail to kill a dinosaur after 2 or 3 shots you
may just want to run away assuming the wounded dino isn’t pursuing you.
This trick will work almost anywhere in the game.
You start in a dry riverbed. Behind you is a Hunting Rifle which you will
need in a minute. As you follow the gully you will soon come to a second
Hunting Rifle. When the riverbed makes a left turn you will spot a slope to
the right. If you climb this hill you will find a wrecked motorcycle and a
Redhawk. Since you should be fully armed at this point you can skip the
climb unless you want to sightsee.
There are several Raptors in the Gorge ahead. While you can kill them from
the safety of the Motorcycle Overlook, chances are you will be more
accurate with your shots if you just face then down below. Continue on to
the giant tree which has fallen into the ravine. Past the tree is a wrecked
truck where you can rearm with a Desert Eagle lying on a crate and a HK 91
Rifle lying in the bed of the truck.
Continue down the trail past more fallen trees until you reach a pair of
Raptors fighting. You can try to sneak by them while they battle or wait
until one is dead then kill the survivor. If you do sneak by, watch out for a
rear attack by the surviving Raptor if you don’t clear his territory fast
enough. The trail narrows and the walls get higher and another Raptor
awaits around the bend.
The next Raptor you encounter will stop and watch you from the shadow of
a jeep balanced on the cliff above. A single shot should bring the jeep
crashing down onto the Raptor – probably the only dino you will ever kill
with a single shot in this game.
Continue out of the gorge past the large rock and out into the open valley
where a T-Rex is fighting a pair of Raptors. Give these guys a lot of
distance and you can just walk past the fight. Stay far to the left and if
the T-Rex spots you simply freeze – remember – they can’t see you if you
don’t move. Once past the battlezone, you will find another abandoned
truck with a Hunting Rifle.
Past the truck and to the left is a waterfall. Down in the valley is a
Parasaurolophus who is under attack from the T-Rex. Stay up on the hill by
the waterfall for a ringside seat at the fight. When it’s over, or when you
get tired of watching, enter the rocky gorge ahead.
Grab the HK VP70 at the wreck and follow the gorge to the giant skeleton.
Three Raptors are in this area, although all might not be visible when you
first enter. Kill them quickly, leading them back into the gorge if necessary
so they can’t surround you. When it’s safe, continue up the path into even
more dangerous ground.
You will arrive on a very narrow ledge that wraps around the left side of a
deep canyon. Down below are many Raptors and a wrecked helicopter. Kill
as many Raptors as you can from the safety of the ledge. When the trail
ends, drop down and kill the rest. Run to the helicopter to find a SB5K
Machine Gun and a Redhawk if you need to rearm. You can also find a
powerful AG-47 on a very narrow ledge to the right just beyond the wreck.
Continue up and out of the canyon and circle around to the left. You should
be high up on the cliff overlooking the canyon with the helicopter wreck. A
giant tree spans the gap and this is your bridge. Walk carefully and prepare
to fight some Raptors waiting on the other side. Head down into the valley
toward the black rocks in the distance.
These rocks are a real pain to climb. Make sure you are jumping to the
lowest possible next step. Sometime you will even have to look for a small
chip knocked out of the rock and jump onto that angled edge and even
double-jump to make it to the top. You will have to cross back and forth to
slowly make your way up. Once on top you can survey the valley below.
Directly beneath you is a small (but deep) lake. Line yourself up with the
lake and jump off feet first – no diving in this game. Exit the lake and make
a dash for the jeep ahead and to the left where a mounted Browning
Machine Gun offers some defense against the Raptors and Albertosaur in
this area.
Past this encounter you will come across another great battle. Two Raptors
are attacking a Parasaurolophus. You can simply avoid this battle by keeping
close to the cliff on the left as you continue toward the power line towers.
A shack in this area contains a PAC-10, Sledgehammer and Rebar. Take the
gun if you need it – the rest is pretty worthless considering what’s ahead.
Follow the power line towers up the hill (numbers should be getting smaller
on the towers), past the wreck jeep and over to the airplane crash. You
should find a AG-47 w/ drum-magazine for serious firepower. Continue
down the road past another pair of Raptors attacking a Parasaurolophus.
Attack them only if they come after you.
Further down the road you will see a crane parked outside the wall to the
town. A pair of Raptors are along this road and there is no other prey to
distract them, so you will have to fight these guys. When you reach the
crane, climb up and onto the beam and them jump over the wall.
The Town – Back to Civilization?
Objectives:
– Crack code for main door
– Find Blue Keycard
– Unlock Dr. Wu’s door from Security Center
– Find Red Keycard in Dr. Wu’s house
– Explore Hammond’s Estate
– Find White Keycard in Hammond’s backyard
– Find Purple Keycard inside Hammond’s house
– Exit via South Gate
– Follow road through valley to dam
– Climb to top of dam and Exit
You should spot a door to the left of the main gate. Enter the small room
and use the keypad to enter the unlock code. The code is written on the
wall. While it may look like BIGLIE from this angle, imagine it turned upside
down and you will get 317618. You could also get into town via the sewer
system further down to the left but who wants to smell like “that”.
A map of the town is posted inside the wall showing you the location of the
Ops Center – probably not a bad choice of first places to visit. Make a
mental note of the two houses to either side of you – you will be returning
to both shortly. Head down Main Street stopping by the nice white houses
on the right. Raptors are up ahead – maybe even stalking you right now. The
large house contains a pair of AK-47’s and a in the back is a Tranquilizer
Pistol. Ignore that unless you are desperate – we don’t want them waking
back up.
You can use the telephone pole to get on the roof if you want to snipe some
dino’s from safety; otherwise, just keep heading into town. Shoot some
hoops across the street if you want, but your main goal is the Ops Center –
after a quick detour to the church.
A quick trip to the church to give thanks for your survival so far is probably
not a bad idea. Plus you will also find a BLUE KEYCARD in the room to the
left of the altar as well as a HK91, Tranquilizer Rifle and Tranquilizer
Pistol scattered about the place.
The Ops Center usually has several Raptors patrolling the perimeter. A
Browning .50 Caliber Machine Gun is mounted on the wall to the right of the
step. Use it to take care of any pursuing dinos then enter the building. A
pair of AG-47’s are in the Animal Control Room. The Radio Room has nothing
but broken equipment and the door at the end can be opened with your
BLUE KEYCARD (aren’t you glad you went to church?).
Read the information on the clipboard to learn that Hammond has the
MASTER KEYCARD and Dr. Wu has the key to Hammond’s house. Other
important info is written on the walls in this room which gives you a clue of
what lies ahead. The security panel is critical to your next step, so go up to
it and press the red “A” button to unlock the gates to Dr. Wu’s estate. You
can now leave the Ops Center and head towards Wu’s house.
If you haven’t already visited them, the Barracks to the right and the Gas
Station and Restaurant directly ahead of you all contain weapons and a
few Raptors lurking around corners. Explore as much as you want (or need
to) but make sure you end up at Dr. Wu’s.
Once you are inside Dr. Wu’s house you should find a RED KEYCARD in the
kitchen. A Redhawk is upstairs on a shelf if you need another weapon,
otherwise head for the big house across the street.
Once inside the wall, head to the backyard and look for a triangle shaped
rock near the back corner of the yard. Behind the rock is a WHITE
KEYCARD. Enter the house through the backdoor and head left. Locate the
secret room behind the bookshelf to get the FLOPPY DISK. Now comes one
of the hardest puzzles of the game.
Head for the staircase and using the three boxes – make steps leading up so
you can jump to the upper portion of the remaining stairs. Use the corner
and walls if necessary and get two boxes stacked about halfway between
the upper and lower portions. Then jump from the lower stairs to the boxes
then finally to the upper portion, double-jumping if necessary to stay up.
Make sure you also have the DISK and WHITE KEYCARD at this point,
otherwise you are going to have to go get them and do this all again.
At the top of the stairs is a Stun Gun; pretty worthless, so ignore it. In
Hammond’s bedroom is a powerful little pistol. Take the Lady’s Model Pistol
with you on your way out and ONLY use it at close range. While it will bring
down a Raptor with a single shot – it aims poorly and is only effective at
point-blank range. Before you can take this weapon you need to get rid of
your current items, so head to the door that requires that WHITE
KEYCARD.
Use Hammond’s computer to listen to his diary – this requires the floppy
from downstairs, then take the PURPLE KEYCARD and leave this place.
Don’t forget that sidearm in the bedroom! Head downstairs and out the
back and leave the estate. Continue across the town toward the South Gate
and use the PURPLE KEYCARD to open it and exit the town.
Follow the road out of town past a frightening pair of Rex’s as they are
engaged in some hunting. Head up over the hill and down the road towards
the large rocks. Raptors are hiding behind most of these rocks and they will
stalk you in true pack-hunter fashion. Do not get distracted by one Raptor
only to get eaten from behind. Always keep your weapons with the most
ammo ready and rearm whenever you find new weapons. A PAC-10 and Belle
Shotgun should be lying along the road on the right after you pass a few
rocks.
You can navigate around the first hole in the road but the second gap will
force you into the valley where you will face at least four or five Raptors.
Try to take them on one at a time. If you don’t put them down after a
couple of shots then move on to the next and hope they don’t follow. Your
objective is the Flood Control Building at the base of the Dam.
A switch inside this building opens one of the steel gates at the bottom of
the dam, but you are still going to need a boost to get inside. If Raptors are
still patrolling the valley you may just want to make a dash for the stairs at
the other side of the dam. If you have cleared the valley and want to get
the pair of SB5 Machine Guns from inside the dam, head over to the stairs
and get a box. Take it back to the dam and place it beneath the door and
use it as a step to get inside and claim your prize.
Climb the steps to get to the top of the dam. A Tranquilizer Rifle is up here
if you need a weapon. This is minor resistance between this point and the
end of the level, but anything helps. Only a pair of Raptors guarding the
trail remain, so kill or wound them and head for the gate at the end of the
road.
Harbor and Lab – Harbor Patrol
Objectives:
– Crack code for main gate
– Find Yellow Keycard in Harbor Master’s Office
– Find info in office on location of Green Keycard
– Find Green Keycard in Atlantic container
– Exit Harbor to Lab Complex
– Find Purple Keycard
– Find Red Keycard and Computer Door Code
– Reboot CRAY
– Exit Level via Paddock Area
Stripped of weapons again you must rearm yourself with the Desert Eagle
and Hunting Rifle located in the weapons locker along the wall behind you.
Head down the road and give the T-Rex and Triceratops a wide berth as
they battle. Continue to the gate with the abandoned bus. A keypad opens
the gate once you learn the code. Looking around you should see a STOP
sign and on the back is the number 1018.
Of course that would be too easy. Assuming this number was written do the
bus driver could read it out of his rearview mirror, that would make the
correct number 8101. Once the gate is open you can enter and grab that HK
VP70 which is a good trade-up from the pistol you currently have.
The harbor complex is a big place but there are few objective and they
must be done in a specific order. Feel free to explore the various areas at
your discretion. There are weapons galore in the warehouses as well as a
gun at the crane and even some over by the gas pumps. The shipwrecked
EMILY is an interested place to visit, but watch out for a very nasty T-Rex
with a bad attitude back by the warehouses. Visit these places and rearm as
the Raptors deplete your ammo.
The Harbor Master’s Office is the first place you must visit. Break away
some of the window supports to enter, then search the bathroom to find the
YELLOW KEYCARD. Grab the SB5 w/ Silencer behind the boxes if you
wish then head to the big central building. This is the main office and
requires the YELLOW KEYCARD to enter.
The only thing you are looking for in this building is a CLUE to the location
of the GREEN KEYCARD. Upstairs and to the rear is a message which tells
you the card can be found in the ATLANTIC. Rather than heading for the
ocean, try to recall that big cargo container over by the crane tilted at the
crazy angle. Printed on the side is ATLANTIC. Now to find a way inside
that thing…
You should find a trailer over by the cargo containers. Shoot or knock out
the supports so the trailer tips over against the building. Use crates to get
onto the trailer then onto the roof of the building. Next, jump to the tin
roof of the gas station, then to the top of the bus. From the bus, you can
jump to each container until you reach the rear of the ATLANTIC box
which is open. Down at the bottom under some water is the GREEN
KEYCARD. Take it and return to the ground then exit through the gate with
the green lock.
Raptors patrol the road leading away from the harbor. Take care of them as
you make your way to the Lab Complex. When you reach the complex you
again have the freedom to search at your leisure. You have a few main goals
which I will outline in detail.
Starting with the Bio-lab, head around to the back and climb up onto the
dumpster and into the window. Explore the building and get the PURPLE
KEYCARD from the upstairs laboratory. Your exit from this building is also
upstairs. Locate the open window that leads to the L-shaped canopy. Jump
out the window and follow the canopy to the Administration building and
enter through that window.
You need to find Hammond’s office located upstairs through some double
doors to the left. Locate the computer door code (526327) and the RED
KEYCARD which is in Hammond’s private washroom. Leave this building and
head to the third and final building. Use the RED KEYCARD to get past the
first door then enter the code to get past the security door.
Once inside the computer room, you need to reboot the CRAY Super
Computer. This is done by pressing a certain sequence of colored buttons.
The code is displayed on the back wall so start pressing the buttons as soon
as you hit the Master Switch just inside the door. The screens will come to
life and Hammond will talk during the entire process. When everything is up
and running and you heard a voice confirmation, you can leave this room
and head for the paddock behind the Administration building.
Open the far right door on the paddock and kill the Raptor. There is a
Barret .50 Caliber Mounted Machine Gun just outside the door, but I could
never lure him out to use it. Use the board to get on top of the wall and into
the next cell. Use the barrels to get onto the crate then onto the next wall
and drop into the narrow passage. Follow this passage around until you
reach the door which exits this level.
Ascent 1 – Ancient Ruins
Objectives:
– Travel through the main valley
– Follow coastline to reach second valley
– Travel through second valley
– Climb the deadly steps
– Explore the Ruins
– Locate the Temple and its Guardian
– Climb the mountain path
Prepare to cross the most dangerous stretch of ground in the entire game.
The long valley that stretches out in front of you is full of hostile and
hungry dinosaurs and your weapons are limited. As always, if you fail to put
down your target in 2 or 3 shots, try to out-run the wounded animal instead.
Stealth is a key factor in getting across this valley. Stay low and out of site
and always check your six for those crafty raptors who will sneak up
behind you. So pick two of the three available weapons Bennelli Shotgun,
Redhawk or the Toxin Rifle and enter the valley.
NOTE: The Toxin Rifle is the only weapon which can take down a T-Rex. If
you think you are good enough to make it to the end of this level with only a
single inventory slot, you can try taking it now and battle the T-Rex at the
Pyramid. This will be your only chance to bag the big guy. Best of luck!
Head into the valley and keep a sharp eye out for lurking dinos. The valley
drops down to the lower valley in various sections; each marked with a
small, but sheer drop-off. An Albertosaurus will be your first encounter
and you really don’t have the ammo to kill him. If he sees you he will hunt
you relentlessly until you get past the first drop-off. Give him a wide berth
and use trees and rocks to hide from his view.
A pair of Raptors are lurking up ahead. One Raptor will charge at you while
the other won’t be as aggressive. Wound or kill them both before
proceeding through this next section. The remain of a previous adventure
contain a Hunting Rifle and extra ammo. Keep advancing through the valley.
Always keep a lookout for Raptors ahead of you. If you spot them first you
can plan the best attack or route around them.
After a few more of the small drop-offs you will spot some large rocks
ahead of you. A Raptor is hiding behind one and behind another are two
Desert Eagles. Proceed to the clearing ahead where an unlucky hunter has
left you a pair of Bennelli Shotguns. When you are fully armed, proceed up
the steep slope to the cliff. Watch for Raptors that move in from the sides
and behind.
After you have admired the ocean view, take a minute to upgrade one of
your weapons to the AG-47 with drum magazine. This weapon will last a
long time – maybe even to the ruins. If you are quick you can dodge the
attacking Raptors and they may fall off the cliff. If not, you can often
shoot them and send them over the cliff. Otherwise, just kill or wound them
enough to get away and proceed down the coastline.
As you follow the coastline you will soon arrive at a pair of Raptors
fighting a Stegosaurus. They won’t bother you if you don’t bother them so
walk around the encounter and head inland to the valley ahead. As you
enter this new valley a pair of nasty Raptors will attack. Teach them some
respect for automatic firearms then head over to the wrecked jeep to find
an HK91.
The valley now hooks back to the right. Stay along the right side to avoid
the Albertosaurus up ahead. If he spots you he will aggressively pursue you.
You can use the big rock to lose him long enough to make your escape to the
wrecked jeep ahead. Personally, I had this guy running laps around the rock
chasing me. Once he finally was on the backside of the rock I made a dash
for the jeep and all he could do was roar in anger.
Grab the Hunting Rifle and extra ammo near the skeleton remains then head
for the stone stair structure. A pair of Raptors will attack and pursue you
to the stairs if you don’t kill them fast. The stairs are quite challenging
with several “Indiana Jones-style” traps that will kill you instantly. If you
aren’t up for the challenge you can always take the high-road to the right
of the stairs. It winds around and will bypass the stairs and even part of
the city ruins ahead.
The stairs feature two types of traps and both are easily defeated/avoided
when you know what they are. The first are giant stone wall slabs that will
fall if you walk past them. You can always spot these slaps as they stick out
from the walls about 12 inches and don’t quite match the textures of the
rest of the structure. Run past (and away from) these slabs to trigger them.
You will always want to trip at least one of these traps per level so you can
escape the stair trap.
The stairs are trapped with huge stone heads that will come rolling down
the stairs as you start up them. When the stone starts to roll down just back
up and sidestep to the side that you have already sprung the wall trap.
Sometimes (due to the physics model) the stone head will get stuck on the
stairs. If this happens you are safe to walk up as it will not come down any
further. Be VERY careful of the stairs as you go higher up this structure.
Sometimes the head will not trigger until you are several steps into the
climb. If this is the case you CANNOT backup fast enough to dodge the
stone – you MUST turn so you can RUN forward then sidestep out of
harm’s way.
The ruins ahead are infested with Raptors. Stay on guard as you explore
the various buildings for a variety of weapons. Keep an eye out for more of
the wall segments that will fall and kill you instantly. Continue through the
city to the large pyramid ahead and meet the huge T-Rex that rules this
area. He will probably charge at you before you make it up the hill to the
pyramid. If so, simply retreat back into one of the buildings and tease him
until he is behind a building. Then make a mad dash for the Pyramid and
climb the steps.
A stone head will roll down the steps which you can easily sidestep. The
T-Rex will have returned by now and should be roaring in anger. He may
even get hit with the head as it hits the ground below. There is a
Tranquilizer Rifle on the pyramid, but nothing will touch the T-Rex except
for that Toxin Rifle from the beginning of this level.
Since killing Mr. T probably isn’t an option, you are going to have to trick
him. He will always try to take the most direct route in his attempt to eat
you. You can use this to your advantage by dropping down the side of the
pyramid closest to the city. Stop when you reach the lowest level of the
pyramid (one step up from the ground). Peek around the corner and get the
big guy’s attention. When he comes after you run around to the back corner
and repeat. When he follows you to this corner run along the back of the
pyramid then along the other side.
You should now be back to the front of the pyramid where you can drop to
the ground and run up the mountain trail. Even if the T-Rex caught onto
your plan, he is too slow to make up the distance before you exit this level.
A few easy obstacles like a gap and a bridge are all that stand between you
and the next level.
Ascent 2 – Race to the Top
Objectives:
– Escape certain death
– Follow the ravine
– Climb the large stones
– Locate the stone pillars
– Climb the switchbacks
– Navigate bridges and planks
– Use trailer to cross gap
– Activate elevator remotely to exit
You start this level facing a hungry Raptor. A Redhawk is in the weapons
box ahead of you, but it’s a tight race. Whether you get the gun or now you
need to walk/slide down the left side. You may take a little damage but the
Raptor won’t follow.
If you got the gun back up top you can head out into the valley where
several Raptors and an Albertosaurus are just waiting to give you an unfair
fight. If you didn’t get the gun, or you just don’t feel like dealing with all
those dinos, then stick to the low and narrow ravine to the left. This will
lead you all the way to the Giant Rocks and you won’t have to fight a single
dino getting there.
Of course if you are a “danger seeker” or are trying to kill everything you
meet, then by all means, visit the Ruins where you will find an AG-47 and a
pair of Raptors. You may even get lucky and kill a dino by pushing some
crumbling ruins on top of them. Of course since you chose this route you
are now obligated to fight the Albertosaurus. You are going to need to put
this bad boy to sleep before you can kill him, so unless you have a
Tranquilizer Pistol you better try Plan “B” – RUN! Otherwise, unload all
your darts into him and he will doze off for about a minute. Run up and
unload your other weapon into his head and he may just die.
Whether you took the safe and cowardly route or the dangerous and
exciting route, you will soon arrive at some very large rocks. Start on the
hill to the left to get onto the first rock then jump from rock to rock until
you get onto the next plateau which overlooks a valley that splits into two
paths.
Start down the hill keeping to the right. Take care of the Raptors as you
start to go back up the next hill which soon turns into a mountain. Follow
the trail and cross the stone bridge where another Raptor needs your swift
attention. Your next bridge is in pretty bad shape. You can try to jump over
the gap or do a balance beam walk along one of the rails. Once you cross,
you can head up the path to get some new weapons; a Hunting Rifle and
Redhawk.
Head down the valley to the right of the weapons stash where three more
Raptors are searching for food. Kill or wound them to get by and climb up
into the upper valley. Keep going until the valley drops down to the right and
up to the left. The left is a short but steep climb to a dead end, so turn and
head right. You should soon see some stone pillars at the base of a huge
mountain.
Explore the pillars to find a pair of Bennelli Shotguns that you will most
certainly need as you begin the long trek up this mountain. Kill (or wound)
the first pair of Raptors that greet you as you start up the mountain trail.
Follow the switchbacks as you make a very steep climb and you will soon
come to some large white rocks. Another pair of Raptors are waiting on the
rocks for you. Kill them or better yet, force them off the side of the
mountain and watch them roll to the bottom.
Continue up the mountain and you will soon find a Hunting Rifle and Desert
Eagle. After you are rearmed continue up more switchbacks and you will
come to another pair of Raptors. Blast them and claim the AG-47 as your
reward. Continue to the wooden bridge that is very much like the teetering
platform from Level 1. Push, drop, or throw a box onto the near side of the
bridge to anchor it to the ground. Now you can run up the ramp and jump to
the other side.
More switchbacks and another dead Raptor later you should arrive at the
worst bridge yet. You can carefully jump across the gaps in the bridge or
better yet, jump onto the rail and balance beam walk across. If you can
walk a straight line this is much easier (and safer) than jumping. A Bennelli
Shotgun and Hunting Rifle are waiting for you on the other side.
The next two obstacles are pretty basic. Grab a rock and toss it onto the
board to lower it down, then run up the board to the next level. The
mountain road ahead is patrolled by a pair of Raptors. You can get the SB5
Machine Gun or if you can outrun the Raptors try to make it to the Browning
M2 which is mounted on the crate. You can blow apart both Raptors with
ammo to spare if they don’t eat you first. Go up the road and get the
Hunting Rifle and extra ammo from the back of the truck then go around
the truck to the right.
The next obstacle is pretty silly but easily solved. Shoot the pivoting board
until it spins around to make a bridge then cross over to the other side. The
boxes ahead will let you jump into the truck where you can claim one or
both of the Redhawks before tackling the three Raptors up around the
bend. Soon you will arrive at a trailer with stacked crates and a AG-47
with drum magazine.
Jump up the boxes to get onto the trailer then walk out until it tilts forward
creating a makeshift bridge. As soon as it tilts, run across and quickly jump
to the other side as the trailer crashes down the side of the mountain. The
trail ends at a sheer cliff wall with a forklift type elevator.
The elevator is controlled by a pair of switches and you must maintain a
constant pressure on the switches to move the platform. Use the switch
furthest from the elevator to lower the platform to ground level. Now go
move the crate which is between the other switch and a sheet of plywood.
Now go stand on the elevator and shoot or throw something at the board to
make it fall onto the switch and raise you to the Summit.
The Summit – Final Conflict
Objectives:
– Find some weapons FAST!
– Get on the roof – Find way into Radio Room
– Extend drawbridge
– Follow mountain path
– Climb the tower using ramps
– Survive the Final Encounter
– Scale the fence to reach Helipad
This is it – it all boils down to the final level. You start at the top of the
elevator on the platform facing a large array of windmills. At least two
Raptors are already alerted to your presence and are approaching at this
very moment. A weapons locker lies directly ahead so race up and get the
Bennelli Shotgun and Desert Eagle then run back to the platform.
Start shooting as the Raptors charge. If you can’t kill them you can at least
force one or maybe both of them off the edge of the elevator. When things
have calmed down you can find the second weapons locker to the right
which contain a Calico SB5 and a Redhawk. The stairs in the back corner
are your next major goal but there are a few things to do down here first.
Go to the back corner (by the stairs) and find the trash dumpster. Use it to
get to the roof of the building then jump across to the next building with
the open skylight. Drop down into the radio room and hit the EMERGENCY
BEACON button. This summons your rescue chopper and extends the bridge
leading from the stairs outside over to the mountain trail. Grab the HK VP70
pistol on your way out of the now-unlocked door. On your way back to the
stairs you can enter that building with the trash dumpster and load up on
fresh weapons. You should find a Belle Shotgun and HK VP70 pistol in this
building. Climb the stairs and cross over to the mountain trail where a pair
of Raptors greet you. You can kill or wound them as usually or you can even
lead them back to the steel bridge and try to get them to fall off.
A third Raptor will attempt a sneak attack (guess I ruined that surprise) so
deal with him then continue up the stairs and grab the Belle Shotgun on the
landing. Another Raptor spots you as you reach the top. Deal with him
swiftly and he won’t even get a chance to bite you. Continue up another
metal stairway and get another Belle Shotgun.
The mountain path splits and Raptors are everywhere. Watch for sneak
attacks from above by a pair of Raptors who aren’t afraid of heights and
will jump down right on top of you. If you go down the left branch you will
still fight the same Raptors but you will get a Redhawk for your troubles.
You should now be at a large steel tower with spiraling ramps leading to the
top. Climb up the ramps until you reach the summit. The partial remains of a
previous adventurer greet you as you jump off the ramp. Take his HK 91
Rifle as he won’t be needing it anymore although it looks like he used about
half your ammo already.
You can move about freely up top as long as you stay along the outer edge.
As soon as you venture near the middle of the complex a pair of Raptors
will almost magically materialize out of thin air and attack from opposite
ends of the compound. Attack them quickly as they are only a minor
diversion for the giant Alpha Raptor who rules this area. Unload everything
you got into these guys – everybody MUST die. A Belle Shotgun with only
partial shells remaining is in the open building – it may come in handy.
Once everyone is dead and you have caught your breath you need to start
building some steps out of those three crates in the center of the compound.
Use two of them to get onto the first level and throw a third one up so it is
waiting to help you onto the top. Now you can jump over the electric fence
and walk out onto the Helipad. The sound of the approaching chopper and
Hammond’s closing narration mark the end of your adventure on Jurassic
Park’s Site B Complex.
Thanks for playing and using Sinjin’s Survival Guide.
CHEATS – When you need that extra edge
tnext – Skip to next objective/waypoint
loc – Display internal map coordinates
bones – Display bounding volumes for all objects
gore 2 – Turns up the blood (I recommend this)
woo – Unlimited ammo for all weapons
Bionic Woman – slower moving but higher jumps
Win – Shows the final movie and credits
Dinos – Freezes all dinosaurs making them easy targets
To enter these codes you must first type CTRL-F11 to bring up the cursor
in the lower-left corner of the screen. Then enter the code followed by
the ENTER key then type CTRL-F11 one more time to complete the entry.
SKIP LEVEL – Press and hold CTRL-Shift-Q-W then release the W
No comments yet. You should be kind and add one!
By submitting a comment you grant TresCom a perpetual license to reproduce your words and name/web site in attribution. Inappropriate and irrelevant comments will be removed at an admin’s discretion. Your email is used for verification purposes only, it will never be shared.